8 Tricks to Speed Up Your Starlink Internet
Starlink has come a long way. Median download speeds now exceed 200 Mbps globally (up 50% from early 2025), latency sits around 26 ms, and the constellation has grown past 9,400 active satellites serving over 10 million subscribers worldwide.
But none of those network improvements matter if your home setup is holding you back. A dish behind a tree, a router in the basement, or an outdated Gen 1 setup can easily cut your real-world speeds in half.
This guide covers everything you can actually control, from dish placement to router upgrades to network settings, so you get every megabit you’re paying for.
Quick reality check: In Canada, most Starlink Residential users see 75–220 Mbps download and 10–40 Mbps upload in 2026. If you’re consistently below 50 Mbps, something in your setup likely needs attention, and this guide will help you find it.
What Starlink Speeds Should You Actually Expect?
Before troubleshooting, it helps to know what “normal” looks like. SpaceX VP of Starlink Engineering Michael Nicolls shared in October 2025 that network-wide median speeds climbed from 140–160 Mbps in January to 210–220 Mbps by October, driven by software improvements and new satellite capacity.
Here’s what real-world data shows for Canadian users in early 2026:
Your actual speeds depend on your plan, location, time of day, and setup. The new Canadian plan tiers introduced in January 2026 cap speeds on lower plans:
| Plan | Price (CAD/mo) | Speed Cap | Priority |
|---|---|---|---|
| Residential 100 Mbps | $70 | 100 Mbps down | Standard |
| Residential 200 Mbps | $110 | 200 Mbps down | Standard |
| Residential Max | $140 | 400+ Mbps (uncapped) | Top priority |
Are you on the right plan? If you’re on the $70 plan and wondering why you never see speeds above 100 Mbps, that’s by design. The speed cap is enforced at the network level. If you consistently need faster speeds, the $110 or $140 plan is the only fix.
Interactive: What’s Slowing Down Your Starlink?
Check off the issues that apply to your setup. We’ll tell you which fixes will give you the biggest speed improvement.
Select everything that describes your situation, then get your personalized fix list.
10 Ways to Speed Up Your Starlink (Ranked by Impact)
We’ve ranked these from biggest impact to smallest. Start at the top and work your way down, most people see noticeable improvement after the first three or four fixes.
Eliminate Dish Obstructions High Impact
This is the single most important factor in Starlink performance. Your dish needs a clear, 100-degree view of the sky to communicate with satellites as they pass overhead at 550 km altitude. Even small obstructions, a tree branch, a chimney, the edge of a roofline, can reduce speeds by 20–50% and cause brief dropouts throughout the day.
What to do: Open the Starlink app and tap Check for Obstructions. Point your phone camera at the sky from your dish’s location. Anything highlighted in red is blocking satellites. Aim for 0% obstruction, anything above 2% will noticeably affect your experience.
Canadian tip: Re-check obstructions seasonally. Trees that were bare in November may block signals by June. Snow buildup on nearby structures can also create seasonal obstructions.
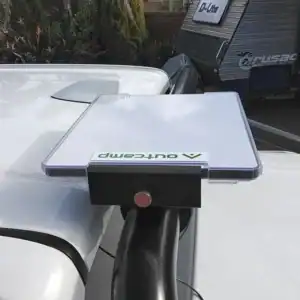
Mount the Dish as High as Possible High Impact
The higher your dish, the wider its view of the sky and the fewer obstructions it encounters. A roof-mounted dish outperforms a ground-level setup almost every time. Independent installers report that relocating a dish from ground level to a rooftop routinely improves throughput by 20–30%.
Mounting options from Starlink: Pipe adapter (fits standard TV antenna mounts), pivot mount, various roof and wall mounts. Third-party J-pole mounts and non-penetrating roof mounts are also popular. The Gen 3 dish is designed to self-level and track satellites automatically, just give it a clear view.
Use an Ethernet Cable for Important Devices High Impact
Wi-Fi is convenient, but a wired Ethernet connection is always faster and more stable. This is especially true for work computers, gaming consoles, smart TVs, and video conferencing setups. A wired connection eliminates Wi-Fi interference, distance issues, and congestion from other wireless devices.
Gen 3 router: Has 2 built-in Ethernet LAN ports — just plug in.
Gen 2 router: Requires the Starlink Ethernet Adapter ($35 CAD).
Gen 1 router: Also has an Ethernet port, but consider upgrading to Gen 3 ($80) for better overall performance.
Upgrade to the Gen 3 Router High Impact
If you’re still on a Gen 1 or Gen 2 router, this is the most impactful hardware upgrade you can make. The Gen 3 router (now just $80 CAD) delivers dramatically better Wi-Fi performance:
| Router | Wi-Fi | Speed @ 3ft | Speed @ 50ft | Mesh |
|---|---|---|---|---|
| Gen 1 | Wi-Fi 5 | 436 Mbps | 47 Mbps | None |
| Gen 2 | Wi-Fi 5 | 670 Mbps | 47 Mbps | Dual-band |
| Gen 3 | Wi-Fi 6 | 864 Mbps | 203 Mbps | Tri-band |
That’s a 4x improvement at 50 feet with the Gen 3. The tri-band radio also means better mesh performance if you add additional nodes. As of December 2025, Starlink ended software updates for Gen 1 routers and is offering affected customers a free Router Mini replacement.
Move Your Router to a Central Location Moderate Impact
Wi-Fi signal weakens with distance and through obstacles. A router tucked in a corner room, closet, or basement forces the signal through extra walls and floors to reach the rest of your home.
Best placement: Elevated (on a shelf or mounted to a wall), in a central room, away from large metal objects, aquariums, mirrors, and appliances like microwaves. The goal is equal distance to all the rooms you use most.
Add Mesh Nodes for Larger Homes Moderate Impact
If your home is larger than 185 m² (2,000 sq ft), has multiple floors, or is built with thick walls (concrete, log, brick), a single router likely can’t cover everything well. Starlink’s mesh system lets you add nodes to extend coverage seamlessly.
Your options (2026 pricing):
- Router Mini ($40 CAD): Dual-band Wi-Fi 6, covers ~120 m² (1,300 sq ft). Perfect for extending to one problem room or a detached garage. Two Ethernet ports built in.
- Gen 3 Mesh Router ($80 CAD): Tri-band Wi-Fi 6, covers ~185 m² (2,000 sq ft). Better for larger extensions or homes with many devices. Two Ethernet LAN ports built in.
You can add up to 3 mesh nodes to a single Starlink network. Place nodes no more than two rooms apart from each other for best wireless backhaul performance.
Manage Your Devices and Bandwidth Moderate Impact
Every device on your network shares the same connection. A 4K Netflix stream uses 15–25 Mbps. A Zoom call needs 3–4 Mbps. A large game update can saturate your entire upload. When everything runs at once, individual speeds suffer.
Practical tips:
- Schedule large downloads and game updates for overnight (most routers and consoles have scheduling options)
- Disable automatic cloud backup during work hours
- Turn off Wi-Fi on devices you’re not using
- Use the Starlink app to see which devices are connected and how much bandwidth each is using
Work Around Peak-Hour Congestion Moderate Impact
Starlink is a shared network. Between roughly 6 PM and 11 PM local time, when everyone is streaming, gaming, and video calling, speeds can dip. This is normal and affects all Starlink plans — though Residential Max users get top priority during congestion.
What you can do:
- Download large files, updates, and backups during off-peak hours (midnight 6 AM is typically fastest)
- If peak-hour speed is critical for your work, consider upgrading to Residential Max ($140/mo) for highest network priority
- This isn’t a problem with your equipment it’s network-level, and it improves as SpaceX adds more satellites
Keep Your Dish Clean and Your Cables Secure Quick Win
The dish has a built-in heater that handles light snow, but heavy accumulation, ice, dirt, bird droppings, and leaves on the dish surface can all weaken the signal. The dish also throttles speed if it overheats, make sure it has adequate airflow.
Maintenance checklist:
- Gently brush off heavy snow with a soft broom (never scrape the dish surface)
- Wipe the dish face with a soft cloth if it’s visibly dirty
- Check cable connections a loose or damaged cable can degrade signal
- Protect outdoor cables from UV damage and wildlife (squirrels love to chew cables)
- Ensure the dish can move freely to track satellites don’t let ice or debris restrict its motors
Reboot Monthly and Keep Firmware Updated Quick Win
A simple reboot clears temporary glitches in both the dish and router software. Unplug both for 60 seconds, plug them back in, and wait 15 minutes for everything to reconnect and acquire satellites.
Firmware updates are pushed automatically by Starlink, but you can check your current version in the Starlink app under Settings > Advanced > Software Update. If you suspect an update is stuck, a reboot usually triggers the download.
Gen 3 improvement: The Gen 3 router has a dedicated reset button, the Gen 2 required plugging and unplugging 6 times to factory reset. Much easier now.
How to Actually Test Your Starlink Speed
Running a speed test sounds simple, but where and how you test makes a big difference in your results. Here’s the right way to diagnose performance issues:
Step 1: Test in the Starlink App
The Starlink app’s built-in speed test measures the connection between your router and the Starlink network. This tells you what your dish and satellite connection are actually delivering, before your local Wi-Fi gets involved. If this number is good (80+ Mbps for most plans), your dish setup is fine and any slowness is a Wi-Fi issue.
Step 2: Test from a Device via Third-Party Tool
Use Speedtest.net or Fast.com from a device connected to your network. This measures real-world speed as your device experiences it, including any Wi-Fi degradation.
Step 3: Compare the Two Results
| Starlink App Speed | Third-Party Speed | What It Means |
|---|---|---|
| Good (80+ Mbps) | Good (similar) | ✅ Everything is working well |
| Good (80+ Mbps) | Slow (under 50 Mbps) | ⚠️ Your Wi-Fi is the bottleneck, improve router placement, add mesh, or use Ethernet |
| Slow (under 50 Mbps) | Slow (similar) | 🔴 Dish or satellite issue — check obstructions, clean dish, check for outages |
Pro tip: Run tests at different times of day. If speeds are good at 10 AM but slow at 8 PM, it’s peak-hour congestion, not your setup. If speeds are consistently slow at all times, it’s likely an obstruction or hardware issue.
When Your Speed Problem Isn’t Something You Can Fix
Some speed issues are on Starlink’s side, not yours. It helps to know the difference so you don’t waste time troubleshooting your setup when the problem is network-level.
Things You Can’t Control
- Network congestion in your cell. Starlink divides coverage into geographic “cells.” If your cell has a lot of subscribers, everyone shares the same satellite capacity. This is the most common cause of evening slowdowns.
- Severe weather. Heavy rain, snow, or thick cloud cover can reduce signal strength and increase latency temporarily. The dish handles light rain and snow fine, but major storms will cause brief dips.
- Satellite handoffs. LEO satellites move fast at 550 km altitude. Your dish constantly switches between satellites as they pass overhead. Most handoffs are seamless, but occasionally one causes a brief (1–3 second) latency spike or packet loss.
- Regional outages. Starlink occasionally has service disruptions for maintenance or software updates. Check the Starlink app for outage notices before troubleshooting.
What’s Coming: V3 Satellites in 2026
SpaceX plans to begin launching next-generation Starlink V3 satellites via Starship in 2026. Compared to today’s V2 Mini satellites, V3 is expected to deliver 10x the downlink capacity and 24x the uplink capacity per satellite. Each Starship launch could add roughly 60 Tbps of new network capacity, about 20x more than a typical Falcon 9 mission. If the timeline holds, this could meaningfully improve speeds and reduce congestion later this year, without any hardware upgrade required on your end.
SpaceX is also lowering ~4,400 existing satellites from 550 km to 480 km altitude throughout 2026, which should slightly reduce latency.
Your Starlink Hardware Options in 2026
Knowing what hardware exists and what it costs helps you make smart upgrade decisions:
| Hardware | Price (CAD) | Wi-Fi | Coverage | Best For |
|---|---|---|---|---|
| Router Mini | $40 | Wi-Fi 6, dual-band | ~120 m² / 1,300 sq ft | Adding coverage to one room, garage, or RV |
| Gen 3 Router | $80 | Wi-Fi 6, tri-band | ~185 m² / 2,000 sq ft | Main router upgrade or large-area mesh node |
| Ethernet Adapter | $35 | — | — | Adding wired connection to Gen 2 router |
| Standard Kit | $349 (or $0 rental) | Includes Gen 3 router | — | New installation (Gen 3 dish + router) |
| Mini Kit | $249 | Built-in Wi-Fi 6 | Limited | Portable/travel (pairs with Router Mini) |
Best value upgrade path: If you have a Gen 1 or Gen 2 router and no mesh, start with the Gen 3 router at $80. It’s the single most cost-effective way to improve your in-home Wi-Fi speed. If you still have dead zones after that, add a Router Mini ($40) for the problem area.
Third-Party Routers: Are They Worth It?
Starlink’s Gen 3 router is perfectly capable for most homes. But some users prefer a third-party router for advanced features like QoS (Quality of Service), parental controls, VPN support, or broader mesh compatibility.
If you go this route, you’ll need to put the Starlink router in bypass mode this turns off the Starlink router’s Wi-Fi and passes the internet connection through Ethernet to your third-party router. For Gen 2 systems, you’ll also need the Ethernet Adapter ($35).
When a Third-Party Router Makes Sense
- You already own a high-quality Wi-Fi 6 or Wi-Fi 6E mesh system (TP-Link, ASUS, Eero, Ubiquiti)
- You need advanced network management features (VLAN, QoS, traffic prioritization)
- You have a very large property that needs 4+ access points
- You’re bonding Starlink with a cellular backup (Peplink routers have specific Starlink optimization features)
When It’s Not Worth It
- You’re hoping a $200 router will somehow make Starlink faster. It won’t, your internet speed is limited by the satellite connection, not the router. A better router only improves the Wi-Fi portion.
- The Gen 3 router + Router Mini covers your home adequately
- You don’t want to manage extra networking equipment
Important: Starlink’s mesh system only works with Starlink routers. The Gen 3 router, Gen 2 router, and Router Mini can mesh together, but none of them are compatible with third-party mesh systems. If you use a third-party router, you’re committing to that ecosystem entirely.
Frequently Asked Questions
It depends. If you’re on the Residential 100 Mbps plan ($70/mo), your download speed is capped at 100 Mbps regardless of what the network can deliver. Moving to Residential 200 Mbps ($110/mo) raises that cap to 200 Mbps, and Residential Max ($140/mo) removes the cap entirely and gives you top network priority during congestion. If your speeds are consistently hitting your plan’s cap, upgrading will help. If your speeds are well below your plan’s cap, the issue is likely your setup, not the plan.
Yes, but usually less than people expect. Light rain and cloud cover have minimal impact. Heavy rain, wet snow, or severe storms can temporarily reduce speeds by 10–20% and increase latency. The dish is designed to operate in temperatures from –30°C to 50°C and has a built-in heater for snow. Blizzards and ice storms will cause the most disruption, but service typically recovers quickly once conditions ease. In Canada, most users report winter performance is surprisingly reliable, the biggest seasonal issue is actually tree foliage returning in summer and creating new obstructions.
Only if you actually need one for privacy or to access geo-restricted content. A VPN adds an extra “hop” to every connection, which increases latency (typically by 10–30 ms) and can reduce throughput. For general use, a VPN makes Starlink slower, not faster. If you do need a VPN, choose a provider with servers close to your location.
The Gen 3 router manages band steering automatically, it decides which band is best for each device. You can’t manually split bands on Starlink’s routers. If you need manual band control, use a third-party router in bypass mode. In practice, the Gen 3’s automatic management works well for most households, and manual splitting is rarely necessary.
The two most common reasons are increased subscribers in your area (more users sharing the same satellite capacity) and new obstructions (tree growth, new construction nearby). Re-run the obstruction check in the Starlink app. If obstructions look clear, the slowdown is likely network congestion. This tends to improve over time as SpaceX launches more satellites, V3 satellites coming in 2026 should significantly increase capacity.
The Gen 3 router supports up to 235 connected devices, and the Router Mini supports up to 128. The practical limit isn’t device count, it’s total bandwidth. A dozen devices casually browsing and streaming will work fine. But if 10 devices are all doing bandwidth-heavy activities (4K streaming, video calls, gaming, large downloads) simultaneously, each will get a smaller share of the total connection. For most Canadian homes with 5–15 connected devices, Starlink handles the load comfortably.
Wondering if Starlink is worth the investment for your situation?
Check out our complete guide covering plans, performance, and honest pros and cons.
Read: Is Starlink Worth It? →